
Desserts
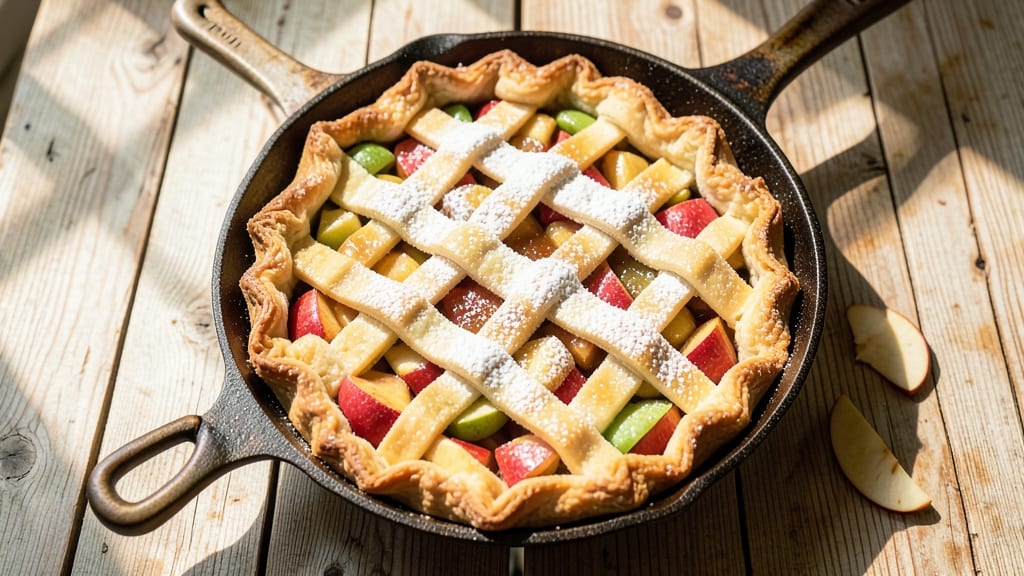
This vintage Betty Crocker apple pie recipe brings back the warmth of mid-century kitchens where golden crusts and spiced fillings ruled dessert tables.
The secret lies in a homemade crust rolled thin and baked until flaky, paired with a filling of tart apples, cinnamon, and nutmeg—just like the recipes that defined American home baking in the 1950s and '60s. I’ve recreated this classic using Betty Crocker’s signature techniques, ensuring every slice delivers that nostalgic, buttery perfection.
The recipe starts with a foolproof crust made from simple ingredients—flour, butter, and ice water—rolled and chilled to achieve that iconic flakiness.
Meanwhile, the filling combines sliced apples (Granny Smith for tartness, Honeycrisp for sweetness) with a blend of brown sugar, cornstarch, and warm spices like cinnamon and nutmeg, all brightened with a splash of lemon juice. This balance of textures and flavors is what makes vintage pies timeless.
Baking at 375°F for about 50 minutes yields a pie with a golden, crackly crust and a filling that’s just tender enough to cut cleanly. The aroma alone—warm cinnamon, caramelizing sugar, and buttery pastry—will fill your kitchen and bring back memories of family gatherings.
Serve it warm with a scoop of vanilla ice cream or a dollop of whipped cream for the full retro experience.
Perfect for holidays, potlucks, or simply satisfying a craving for classic comfort, this pie is a restaurant-quality dessert you can make at home. The techniques are straightforward, but the result is anything but ordinary—just as Betty Crocker intended. Let’s get baking!
Ingredients for vintage betty crocker apple pie
Simple pantry staples transform into nostalgic, golden apple pie perfection with Betty Crocker’s classic techniques.
| Ingredient | Amount | Notes |
|---|---|---|
| All-Purpose Flour 🌾 | 2 ½ cups | Sifted for lighter texture |
| Unsalted Butter 🧈 | 1 cup | Cold, cubed for flakiness |
| Granny Smith Apples 🍎 | 4 medium | Peeled, sliced 1/4-inch thick |
| Honeycrisp Apples 🍎 | 4 medium | Peeled, sliced 1/4-inch thick |
| Light Brown Sugar 🍚 | 1 ¼ cups | Packed firmly for sweetness |
| Cornstarch 🌾 | ¼ cup | For thickened filling |
| Ground Cinnamon 🌿 | 2 tbsp | Pure, aromatic variety |
| Ground Nutmeg 🌿 | ½ tsp | Freshly grated preferred |
| Lemon Juice 🍋 | 2 tbsp | Freshly squeezed |
| Ice Water 💧 | ½ cup | Chilled for crust |
| Sea Salt 🧂 | ½ tsp | Fine grain preferred |
| Vanilla Extract 🌸 | 1 tsp | Pure, high-quality |
The flour and unsalted butter form the foundation of this iconic crust. For optimal results, use Archer Farms flour—its protein content yields the best flakiness. The butter must be cold and cubed; never softened or melted. Land O’Lakes unsalted butter is a reliable choice, but European-style butter with higher fat content delivers superior texture. Chill your rolling pin and work surface to prevent the dough from warming during assembly. This vintage recipe relies on the ice water to bind the dough without overworking it, so keep it on hand.
Apple selection is critical: Granny Smith provides the tartness, while Honeycrisp adds sweetness and texture. If these varieties are unavailable, Fuji or Braeburn apples work well as substitutes. For the filling, light brown sugar caramelizes beautifully, but dark brown sugar can be used at a slightly reduced amount. The cornstarch ensures a thickened filling that holds its shape—Bob’s Red Mill is a trusted brand. Lemon juice brightens the filling, and ReaLemon concentrated juice simplifies measurement. Pre-grated spices often contain anti-caking agents that dull flavor; McCormick pure spices are a professional-grade alternative.
Store the pie dough between two sheets of parchment paper in the refrigerator for up to 48 hours before baking. The assembled pie can be refrigerated for 24 hours before baking, allowing flavors to meld. For longer storage, freeze the unbaked pie (wrapped tightly) for up to 3 months350°F oven for 10-15 minutes. The filling thickens as it cools, so slice when still warm for the cleanest cuts. Serve with homemade vanilla ice cream for an authentic mid-century experience.
Why You'll Love This Recipe
- No-Roll-Pastry Shortcut: I swear by this trick—just mix cold butter into flour until it resembles crumbs, then press it into the pan. No chilling, no fuss, and that flaky texture still happens. Even my kids can handle the dough step.
- Tart-Sweet Magic: Granny Smiths for the sharp bite, Honeycrisp for the juicy crunch—tossed with brown sugar and a whisper of cinnamon. It’s the kind of pie that makes you close your eyes mid-bite, like a hug in dessert form.
- Potluck Proven: This pie travels beautifully (no soggy bottoms, promise) and disappears in minutes at gatherings. I’ve taken it to Thanksgiving, book club meetings, and even my neighbor’s birthday—everyone asks for the recipe.
- Budget-Friendly Luxury: Uses pantry staples and seasonal apples, but tastes like you spent hours. A single pie costs me about $8 to make and feeds six—leftovers? They’re my secret weapon for breakfast the next morning.
Step-by-step instructions for vintage Betty Crocker apple pie
This classic method delivers a flaky, buttery crust and perfectly spiced filling that stays moist slice after slice.
Prepare the Homestyle Crust
In a large mixing bowl, combine the 2.5 cups all-purpose flour with the 0.5 teaspoon sea salt. Cut in the 1 cup unsalted butter using a pastry cutter or your fingers until the mixture resembles coarse crumbs with pea-sized butter pieces remaining. This texture is crucial for achieving that signature flaky layer.
Gradually add the 0.5 cup ice water, one tablespoon at a time, mixing gently with a fork until the dough just comes together. Avoid overmixing—you're looking for a soft, slightly tacky dough that holds when pressed. Divide the dough into two equal portions, flatten into discs, wrap in plastic, and refrigerate for at least 1 hour. This resting period relaxes the gluten, making rolling easier and preventing shrinking during baking.
Assemble the Cinnamon-Spiced Filling
In a large bowl, combine the peeled and sliced 4 medium Granny Smith apples and 4 medium Honeycrisp apples. The tartness of the Granny Smith balances the sweetness of the Honeycrisp, creating that perfect vintage flavor profile. Sprinkle with the 1.25 cups light brown sugar, 2 tablespoons ground cinnamon, 0.5 teaspoon ground nutmeg, and 1 teaspoon vanilla extract. Toss gently to distribute the spices evenly.
In a small bowl, whisk together the 0.25 cup cornstarch with 2 tablespoons lemon juice. This mixture prevents the filling from becoming watery during baking. Pour over the apple mixture and toss again until every slice is lightly coated. Let the filling sit for 15 minutes while you roll out the crust—this allows the cornstarch to begin absorbing moisture and the flavors to meld.
Roll and Layer the Crust
On a lightly floured surface, roll out one dough disc into a 12-inch circle, about ⅛-inch thick. Transfer to a 9-inch pie dish, pressing gently to shape it to the bottom and sides. Trim any excess dough hanging over the edge, leaving about ½-inch overhang. Save the trimmings for a small lattice top or crust decoration.
Pour the prepared apple filling into the crust, mounding it slightly in the center. Roll out the second dough disc to the same size and place it over the filling. Trim the top crust to match the bottom edge, leaving a ½-inch overhang. Fold the overhangs under and crimp the edges using your fingers or a fork to create a decorative seal. Cut 4-5 slits in the center to allow steam to escape during baking.
Bake to Golden Perfection
Preheat your oven to 375°F. Place the assembled pie on a baking sheet lined with parchment paper to catch any drips. Bake for 50-55 minutes, until the crust is deep golden brown and the filling is bubbling through the slits in the top crust. The edges should be crisp, and the filling should be thickened but still tender.
Here's the thing—don't open the oven during baking. The temperature fluctuations can cause the crust to puff up unevenly and potentially collapse. If the top crust browns too quickly, loosely tent it with aluminum foil after 30 minutes to prevent over-browning while the filling finishes cooking. The pie is done when the internal temperature reaches 190°F at the center.
Cool and Serve
Remove the pie from the oven and let it cool on a wire rack for 2 hours. This resting period allows the filling to set properly and prevents a soggy bottom. The crust will firm up as it cools, developing that beautiful flaky texture that makes this pie so special.
Slice into 8 equal wedges and serve warm. The crust should be crisp and golden, the filling thick but not dry, with a perfect balance of sweet and spiced apple flavors. For an authentic vintage touch, dust with powdered sugar or serve with a scoop of vanilla ice cream. The contrast of the cold ice cream with the warm pie is pure nostalgia.
Pro Tips For Making Vintage Betty Crocker Apple Pie
- Chill the Dough: DESCRIPTION: Roll out the crusts straight from the fridge—cold butter means flaky layers, not greasy messes. I used to skip this and ended up with a sad, dense bottom crust every time.
- Peel and Core Apples: DESCRIPTION: Granny Smiths and Honeycrisps stay crispest when peeled—tartness shines without fiber. Slice them thin (¼-inch) so they cook evenly and don’t turn to mush.
- Skip the Overmixing: DESCRIPTION: The crust dough only needs 30 seconds of mixing—overworking it makes it tough. Press it gently into the pan and patch cracks with extra dough scraps.
- Bake with a Bake Sheet: DESCRIPTION: Place a rimmed tray under the pie for the first 20 minutes—it catches spills and ensures the bottom crust browns evenly. (Yes, even with Betty Crocker’s recipe, which sometimes underestimates oven quirks.)
Flavor customization for this vintage betty crocker apple pie
Spice Level Boost
For a bolder flavor profile, add ½ teaspoon ground allspice or ¼ teaspoon cayenne pepper to the filling. The allspice enhances the warm, earthy notes of cinnamon and nutmeg, while cayenne adds a subtle kick that pairs beautifully with vanilla ice cream.
I like to use Penzeys Spices for their high-quality, freshly ground options. 🌶️
Sweet-Tart Balance
Adjust the sugar-to-apple ratio based on your preference. For a sweeter pie, increase the brown sugar to 1.5 cups and reduce the lemon juice to 1 tablespoon. Conversely, for a more tart version, use 1 cup brown sugar and add 1 extra tablespoon lemon juice.
I often taste the filling before baking to fine-tune the balance.
Nutty Crunch Addition
Sprinkle ½ cup chopped walnuts or pecans over the filling before adding the top crust for texture. Toast the nuts in a dry skillet for 3-4 minutes until fragrant, then cool before adding.
This adds a delightful crunch that contrasts the soft filling. For a vintage touch, use Southern Living brand pecans—they’re consistently high-quality.
Herbal Twist
Infuse the filling with 1 teaspoon fresh thyme leaves or ½ teaspoon dried thyme for an unexpected but authentic mid-century flavor. The herbal note complements the cinnamon beautifully. I like to finely chop the thyme stems along with the leaves to maximize flavor.
Pair this variation with a drizzle of honey after baking for a modern twist.
Cream Cheese Swirl
Create a creamy center by mixing 4 oz softened cream cheese with 2 tablespoons powdered sugar and 1 teaspoon vanilla extract. Drop spoonfuls of this mixture over the filling before adding the top crust.
The cream cheese swirls melt into a luscious, tangy-sweet center that balances the spiced apples. Use Philadelphia cream cheese** for consistent results.
Nutrition facts
Frequently asked questions
Can I use store-bought crust instead of homemade dough?
For convenience, use a 9-inch refrigerated pie crust (like Pillsbury) and follow the package instructions for rolling and fitting it into your dish. Chill the crust for 15 minutes before adding filling to prevent shrinking. If using a pre-made bottom crust, blind-bake it for 10 minutes at 375°F to ensure it holds its shape during baking.
What's the best way to prevent a soggy bottom crust?
Prevent soggy crusts by pre-baking the bottom crust for 8-10 minutes before adding filling, or by sprinkling ½ cup cornstarch or crushed graham crackers on the bottom crust before filling. Another trick is to chill the assembled pie for 30 minutes before baking—this helps the filling firm up faster during the initial baking stages.
Can I make this pie ahead of time?
Yes! Assemble the pie (unbaked) and refrigerate for up to 24 hours before baking. For longer storage, freeze the unbaked pie (wrapped tightly) for up to 3 months. Thaw overnight in the fridge before baking. Baked pies reheat beautifully in a 350°F oven for 10-15 minutes to restore warmth and crispiness.
Why does my crust turn out tough instead of flaky?
Tough crusts usually happen from overworking the dough or using warm butter. Keep everything cold—ice water, chilled rolling pins, and cold butter cubes. Work quickly and avoid excessive handling. Also, ensure your flour is fresh (old flour loses gluten structure). If the dough feels dry, add 1 teaspoon ice water at a time until it just holds together.
What's the secret to a perfect lattice crust?
For a vintage lattice, cut the top crust into 1-inch strips and weave them over the filling in a classic crisscross pattern. Brush strips lightly with egg wash before baking for extra crispness. Start with a base row of strips, then alternate weaving over and under each strip. Leave the center open for steam to escape—this prevents a soggy filling while keeping the lattice crisp.