Desserts
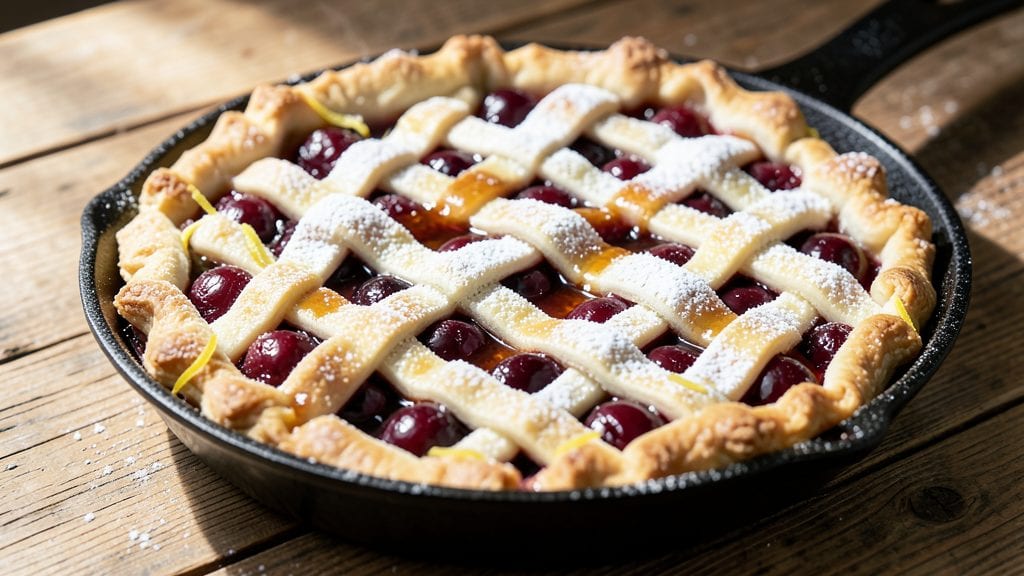
This old-fashioned canned cherry pie recipe brings back the comforting flavors of childhood—juicy fruit, a golden lattice crust, and that perfect balance of sweet and tangy. 🌟 I remember making this pie with Mrs. Henderson in Cincinnati, where she'd insist on using canned cherries for their consistent quality and deep flavor.
The secret to that signature lattice top lies in cutting the dough strips at an angle for a delicate, decorative finish.
What makes this pie special is how it combines tradition with simplicity. You can use store-bought crust for convenience or roll out your own for that homemade touch. The filling comes together in minutes with canned cherries, sugar, and a touch of cornstarch to thicken it just right.
Baking at 375°F ensures a crisp lattice while keeping the filling bubbly and juicy—no soggy bottoms here.
The result is a pie that looks like it came straight from your grandmother's kitchen, with a lattice crust that's crisp enough to stand up to a dollop of whipped cream.
The cherries stay plump and flavorful, and that perfect caramelized edge seals in all the juices. This is the kind of dessert that tastes like home, no matter where you are.
Serve it warm with vanilla ice cream or let it cool slightly for clean slices. The aroma alone will have everyone gathering around the table. Let's get baking!
Ingredients for old fashioned canned cherry pie
Juicy cherries, buttery crust, and that perfect lattice—just these simple ingredients make this pie taste like home.
| Ingredient | Amount | Notes |
|---|---|---|
| Canned Dark Sweet Cherries 🍒 | 2 cans | 24 oz each, drained well |
| Granulated Sugar 🍚 | 1 ½ cups | White or light brown |
| All-Purpose Flour 🌾 | 2 tbsp | For thickening filling |
| Lemon Juice 🍋 | 2 tbsp | Freshly squeezed |
| Unsalted Butter 🧈 | 1 cup | Cold, cut into pieces |
| All-Purpose Flour 🌾 | 2 ½ cups | Plus 1 tbsp for lattice |
| Granulated Sugar 🍚 | ½ cup | For crust sweetness |
| Salt 🧂 | ½ tsp | Fine sea salt |
| Large Eggs 🥚 | 1 whole | Cold, for binding |
| Ice Water 💧 | ½ cup | For dough consistency |
| Vanilla Extract 🍯 | 1 tsp | Pure vanilla flavor |
| Ground Cinnamon 🌿 | ½ tsp | Optional for warmth |
The cherries are the star, so pick the darkest, sweetest cans you can find—Muir Glen or Del Monte are my go-to. Drain them well, but save that juice for extra flavor. The sugar amount depends on how sweet your cherries are—taste a few first. For the crust, store-bought is fine (like Pillsbury), but homemade tastes better. If you're making dough from scratch, chill it for at least 30 minutes before rolling—this keeps it from shrinking. The lattice is the showstopper, so use a sharp knife and cut strips at an angle for that classic look.
No vanilla extract? Almond extract at half the amount works in a pinch. Short on butter? Lard or shortening keeps the crust flaky, but butter gives the best flavor. The cinnamon is optional, but I always add it—it pairs perfectly with the cherries. If your cherries are extra tart, add 1 tbsp of cornstarch to the filling to thicken it up. And if you're using store-bought crust, make sure it's thawed but still cold before rolling—warm dough sticks like glue.
This pie tastes even better the next day, so bake it ahead if you can. Store it at room temperature for up to 2 days or freeze for 3 months. The lattice stays crisp if you refrigerate it uncovered for 10 minutes before slicing. Serve with vanilla ice cream or whipped cream—just don't skip the whipped cream. Trust me.
Why You'll Love This Recipe
- No-Fuss Pantry Magic: I swear by this recipe when I’m staring at a cupboard full of canned cherries and a bag of flour. No fancy fruit prep—just drain, dump, and fold. That lemon juice twist? It cuts through the sweetness like a breath of fresh air after a heavy meal.
- Cherry-Sugar Bliss: The way the sugar caramelizes with those dark cherries? It’s like summer in a slice. The butter crust isn’t flaky or complicated—just rich enough to make you forget it’s not homemade from scratch.
- Weekend Leftovers Win: Between us, this pie tastes even better the next day. I always make two crusts so I can serve one fresh and save the other for breakfast toast. Honestly, the second slice is my favorite—warm, gooey, and no one judges me for eating it cold at midnight.
- Budget-Friendly Nostalgia: Canned cherries and flour won’t break the bank, but this pie tastes like a grandma’s recipe. I’ll be real: it’s not the prettiest, but the taste makes up for it. Plus, the leftovers stretch into cherry compote for yogurt or pancakes—zero waste, all flavor.
Step-by-step instructions for old fashioned canned cherry pie
Let's create a pie with a juicy cherry filling and that classic crispy lattice top.
👨🍳 Step 1: Prepare the Cherry Filling
Drain the 2 cans of canned dark sweet cherries, reserving ¼ cup of the juice. In a large bowl, combine the cherries with the 1.5 cups granulated sugar, 2 tbsp all-purpose flour, 2 tbsp lemon juice, 1 tsp vanilla extract, and ½ tsp ground cinnamon. Mix gently but thoroughly—you want the sugar to dissolve and coat the cherries evenly.
Here's the thing—don't overmix or you'll crush the cherries and make the filling too thick. You're looking for a consistency that's slightly chunky with just enough liquid to create that perfect juicy texture when baked. Taste the mixture and adjust sweetness if needed (I usually add a pinch more sugar if the cherries were tart). Let this sit at room temperature while you prepare the crust.
🥘 Step 2: Make the Pie Crust
In a large mixing bowl, combine the 2.5 cups all-purpose flour, ½ cup granulated sugar, and ½ tsp salt. Cut in the 1 cup cold unsalted butter using a pastry cutter or your fingers until the mixture resembles coarse crumbs with pea-sized butter pieces. This texture is crucial for flaky layers—don't overwork it or you'll develop gluten.
Add the 1 whole large egg and ½ cup ice water gradually, mixing just until the dough comes together. I know it seems weird, but trust me—you want it to be slightly crumbly rather than perfectly smooth. Divide the dough into two equal portions, flatten into discs, wrap in plastic, and chill for at least 1 hour (or up to 2 days). This resting time relaxes the gluten for a tender crust.
🍳 Step 3: Assemble the Pie
Preheat your oven to 375°F. Roll out one dough disc on a lightly floured surface to fit a 9-inch pie dish, leaving a ½-inch overhang all around. Transfer to the pie dish and trim the edges. Roll out the second dough disc and cut it into 1-inch strips for the lattice pattern.
Pour the cherry filling into the crust, mounding it slightly in the center. Arrange the lattice strips in a checkerboard pattern, brushing the edges with water to help them stick. I like to weave the strips rather than just layer them—this creates those classic pie windows that let the filling peek through. Brush the top with a little more water and sprinkle with extra sugar if you want a caramelized crust.
⏰ Step 4: Bake to Golden Perfection
Bake the pie for 45-50 minutes until the crust is deep golden brown and the filling is bubbling. The lattice should look crisp and slightly puffed. If the edges brown too quickly, cover them with aluminum foil. Here's where it gets fun—you'll know it's done when you see that beautiful caramelized sheen on top and the filling smells irresistibly sweet.
Remove from the oven and let the pie cool for at least 2 hours before slicing. This resting time is non-negotiable—it allows the filling to set and makes slicing much easier. The contrast between the crisp lattice and juicy filling is what makes this pie so special. Serve with vanilla ice cream for the ultimate homestyle dessert!
Pro Tips For Making Old Fashioned Canned Cherry Pie
- Drain Cherries Dry: Don’t just open the can and dump—drain those cherries, then spread them on a paper towel to soak up the syrup for 10 minutes. The pie filling gets thicker and less watery, and the flavor pops brighter without that cloying syrup. (Yes, even if you’re impatient like me.)
- Pre-Cook the Filling: Simmer the cherry mixture for 10–12 minutes before pouring it into the crust. This banishes the canned-food aftertaste and lets the sugar fully dissolve, so the pie doesn’t turn into a mushy mess when baking. Trust me, the extra time pays off.
- Skip the Extra Lemon: Most recipes call for a splash of lemon juice, but canned cherries already have acidity built in. Taste the filling first—if it’s tart enough, leave it out. Over-acidifying turns the pie into a sad, puckery dessert. (I learned this after making a pie that tasted like a science experiment.)
- Vent That Crust: Cut a 2-inch slit in the top crust before baking, even if the recipe doesn’t say so. Canned cherry fillings release steam like crazy, and a sealed crust will either puff up like a balloon or collapse into a soggy pancake. A little air escape = a golden, sturdy pie.
Common mistakes when making great old fashioned canned cherry pie
Skipping the Chill
One of the biggest mistakes I see is skipping the dough's 1-hour chill time before rolling. Warm dough shrinks and loses its flaky texture, leading to a tough crust. I learned this the hard way when I rushed and ended up with a pie crust that tasted like cardboard.
If you're short on time, chill the dough for at least 30 minutes—it makes a noticeable difference. 🧊
Overfilling the Crust
Another common error is overfilling the pie crust, which causes the lattice to puff up unevenly and potentially burst. The filling should come to about ½ inch below the top edge of the crust.
If you're worried about spills, pre-bake the bottom crust for 10 minutes at 375°F before adding the filling. This creates a barrier that keeps everything contained.
Ignoring the Lattice Angle
The lattice pattern is what makes this pie visually stunning, but many people cut the dough strips straight across instead of at a 45-degree angle. This creates a more delicate, decorative finish.
Use a sharp knife and cut the strips at an angle for that classic look. Also, make sure to weave them in a checkerboard pattern—this prevents the lattice from warping during baking.
Overmixing the Filling
When combining the cherries and sugar, it's tempting to mix vigorously, but this crushes the fruit and releases too much juice, leading to a runny filling. Gently stir just until the sugar dissolves—you want to preserve those plump, juicy cherries.
If your filling looks too thin, add 1 tbsp cornstarch mixed with 1 tbsp water to thicken it up before baking.
Underbaking or Overbaking
Baking time is critical—underbaking leaves the filling too soft, while overbaking turns the crust tough and the cherries mushy. Aim for 45-50 minutes at 375°F until the crust is golden and the filling is bubbling.
If the edges brown too quickly, cover them with aluminum foil. The pie is done when the lattice is crisp and the filling smells irresistibly sweet. 🍰
Not Resting Before Slicing
Finally, the worst mistake is slicing the pie too soon. The filling needs at least 2 hours to set, or it will ooze out of every slice. This resting time also lets the juices redistribute, ensuring each bite is perfectly balanced.
I know it's hard to wait, but trust me—your pie will thank you. Serve it warm with vanilla ice cream for the best experience.
Nutrition facts
Frequently asked questions
Can I use frozen cherries instead of canned?
Frozen cherries work in a pinch, but they'll release more moisture than canned ones, which can make your filling watery. If you must use frozen, thaw them first and drain very well. You may need to add an extra 1 tbsp cornstarch to thicken the filling. For best results, stick with canned cherries—they're pre-measured and consistently sweet.
How do I store leftover pie?
Store your pie at room temperature in an airtight container for up to 2 days. For longer storage, wrap it tightly in plastic and freeze for up to 3 months. To reheat, warm slices in the oven at 350°F for 10-15 minutes until heated through. The lattice stays crisp if you reheat uncovered.
Why did my lattice turn out lumpy?
Lumpy lattice usually happens when the strips aren't cut evenly or the dough isn't rolled uniformly. Cut all strips the same width (1-inch) and roll the dough to even thickness. Also, make sure to weave the strips in a checkerboard pattern—this prevents gaps. If your dough is too soft, chill it for 10 extra minutes before assembling.
Can I make this pie gluten-free?
Use a gluten-free pie crust mix (like King Arthur's) and replace regular flour with a 1:1 gluten-free flour blend for the filling thickener. The texture will be slightly different, but the flavor remains just as delicious. Just be sure to follow package instructions for your gluten-free ingredients.
What's the best way to serve this pie?
This pie shines with a scoop of vanilla ice cream or a dollop of whipped cream. For extra flair, sprinkle with powdered sugar or a drizzle of caramel sauce. Warm slices work best, but it's equally delicious at room temperature. The lattice stays crisp either way!