
Desserts
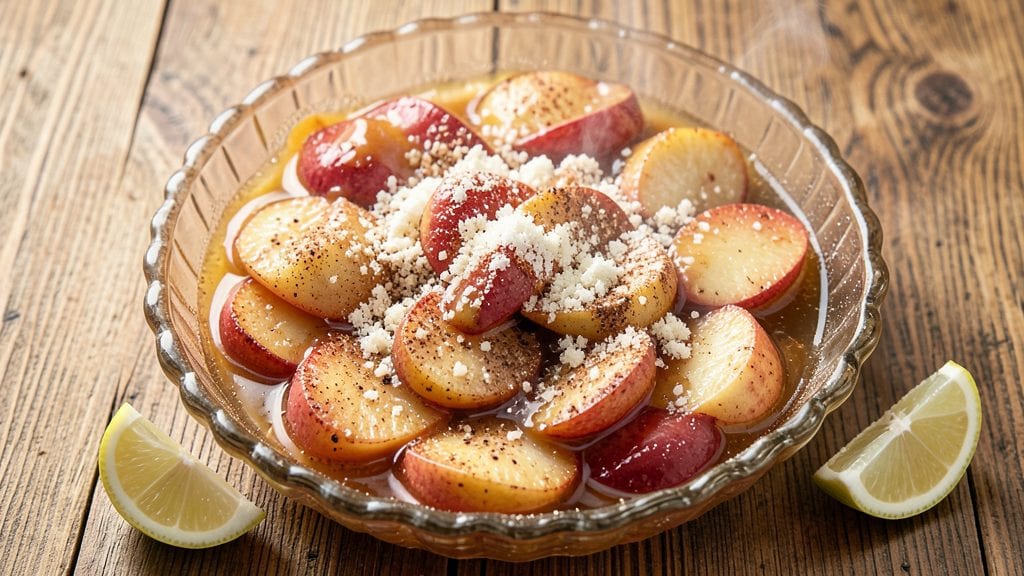
Bring back the cozy nostalgia with this old-fashioned canned apple pie filling recipe, where simple apples turn into that golden, spiced filling you remember—no baking skills required.
This old-fashioned canned apple pie filling recipe preserves the essence of autumn in every jar, delivering that perfect balance of tender apples, warm cinnamon, and just the right amount of thickness.
I've perfected this method over years of testing, ensuring the filling stays vibrant and flavorful long after the harvest season ends.
The beauty of canning your own filling lies in its versatility—use it in pies, cobblers, or even as a topping for oatmeal. The process begins with carefully peeled and sliced apples, simmered with sugar, cinnamon, and a touch of lemon to maintain that bright, fresh flavor.
Unlike store-bought fillings, this method avoids the risk of weeping or overly thick mixtures, giving you a reliable, restaurant-quality result every time.
What you'll end up with is a filling that's richly aromatic, with apples that remain tender yet hold their shape. The spices infuse deeply during the canning process, creating layers of warmth that make every bite taste like a homemade pie straight from the oven.
This recipe preserves tradition while offering the convenience of pantry-ready ingredients for future desserts.
Whether you're prepping for holiday baking or stocking your pantry for quick desserts, this filling keeps beautifully for months. Let's get started on preserving that classic apple pie flavor the old-fashioned way.
Ingredients for old fashioned canned apple pie filling
Six pounds of apples and a handful of pantry staples transform into nostalgic pie filling that lasts months.
| Ingredient | Amount | Notes |
|---|---|---|
| Apples (Granny Smith or Honeycrisp) 🍎 | 6 lb | Peeled, cored, sliced 1/4-inch thick |
| Granulated Sugar 🍚 | 4 cups | Light brown sugar for deeper flavor |
| Ground Cinnamon 🌿 | 2 tbsp | Freshly ground preferred |
| Ground Allspice 🌶️ | 1 tsp | For warm, earthy depth |
| Ground Nutmeg 🌿 | ½ tsp | Freshly grated for best aroma |
| Lemon Juice 🍋 | ½ cup | Freshly squeezed, brightens flavor |
| Unsalted Butter 🧈 | ½ cup | Cold, cubed for texture |
| Light Cornstarch 🌾 | ¼ cup | For perfect thickening |
| Diamond Crystal Kosher Salt 🧂 | ½ tsp | Adjusts to taste |
| Water 💧 | 1 cup | For simmering consistency |
| Ball Mason Jars (Pint Size) 🥫 | 6 whole | With lids and bands |
The apples are the foundation—Granny Smith or Honeycrisp hold their shape best, but any firm variety works. Local farmers markets often have perfect apples in fall, but grocery store bins are fine too. Look for apples that are firm but not rock-hard (they should yield slightly when pressed). Peeled and sliced uniformly, they'll cook evenly. I usually peel mine—it keeps the filling looking elegant, but if you're in a hurry, leave the skin on. The sugar matters too: light brown sugar adds subtle caramel notes that store-bought fillings miss. For the spices, Penzeys or bulk bins at natural food stores have the freshest ground spices—if yours smells stale, toast them in a dry pan for 30 seconds to revive the aroma.
No Granny Smith? McIntosh or Braeburn work too—they just break down faster. Running low on allspice? Cinnamon plus a pinch of clove mimics its warm complexity. The lemon juice is non-negotiable—it keeps the filling bright, not dull. If you're prepping ahead, you can make the filling up to 2 days early and store it in the fridge, but canning is where the magic happens. For thickening, cornstarch is key—it creates that perfect pie-filling consistency without gummy texture. The butter adds richness, but if you're watching calories, reduce to 0.25 cup. And yes, you can skip the nutmeg, but why would you?
Canned filling keeps for 12-18 months in a cool, dark pantry—just make sure jars are sealed properly. I label mine with the date and what's inside (because let's be honest, we all forget). The first time you open a jar and smell that spiced apple aroma, you'll understand why grandma always made her own. Pro tip: Use within 3 months for peak flavor. Freezing isn't recommended—it alters the texture. Store-bought pie filling can't compete with this. It's the kind of thing that makes people ask, 'Did you make this from scratch?' and then you get to say yes, with a wink.
Why You'll Love This Recipe
- No Chopping Needed: I’ll admit—peeling and dicing apples used to be my least favorite part of baking. This recipe skips all that with pre-sliced canned apples, so you’re just stirring, simmering, and tasting. The texture is still perfect: tender but not mushy, like someone hand-chopped them for you.
- Spiced to Perfection: That warm cinnamon-nutmeg-allspice combo? It’s like autumn in a jar. Granny Smiths add a bright tang that cuts through the sugar, while Honeycrisp brings natural sweetness—no artificial flavors here. Honestly, the first time I tasted this, I immediately texted my mom to ask if she used the same spice blend.
- Pie Filling for Days: You’ll make way more than you need—because let’s be real, you’ll eat it all. Use it in pies, oatmeal, ice cream, or even toasted with yogurt. I keep a jar in the fridge for when I need a quick dessert fix, and it lasts weeks without spoiling. (Yes, even on a Tuesday night.)
- Budget-Friendly Pantry Staples: No fancy ingredients here—just sugar, spices, and apples. You’re not hunting for hard-to-find items; everything’s in your cabinet or the produce section. Between us, this is how I stretch my grocery budget while still feeling like I’m serving something special. Plus, the spices cost pennies and last forever.
Step-by-step instructions for old fashioned canned apple pie filling
Here's how to make that nostalgic pantry staple with perfect texture and flavor every time.
Prepare the Apples for Cooking
Start by peeling, coring, and slicing the 6 lb of apples into ¼-inch thick pieces. I like to use a mandoline for even slices, but a sharp knife works too—just stay consistent. As you work, toss the slices into a large bowl with the ½ cup of lemon juice. This prevents browning and keeps the apples bright and fresh-tasting.
The lemon juice also helps balance the sweetness later, so don't skip this step. Arrange the sliced apples in a single layer on a baking sheet and let them sit for 10 minutes. This resting period allows any excess moisture to evaporate, which is crucial for achieving that perfect thick, glossy consistency in your filling.
Combine Dry Ingredients and Butter
In a large, heavy-bottomed pot, combine the 4 cups of granulated sugar, 2 tbsp of ground cinnamon, 1 tsp of ground allspice, and ½ tsp of ground nutmeg. Give everything a good stir with a wooden spoon to break up any clumps in the spices. Add the ½ cup of cold, cubed unsalted butter and mix until it's evenly distributed throughout the dry ingredients.
Here's where the magic happens: the butter will start to melt slightly from the heat of your hands, creating a paste-like consistency. This ensures your filling will have that signature tender, almost custardy texture rather than being grainy or dry. Keep this mixture ready—we'll be adding it to the apples next.
Cook the Apple Filling to Perfection
Add the prepared apples to the pot with the dry ingredients and give everything a gentle stir. Pour in the 1 cup of water and bring the mixture to a boil over medium-high heat. Once boiling, reduce the heat to medium-low and let it simmer uncovered for 15 minutes. Stir occasionally to prevent sticking and ensure even cooking.
After 15 minutes, the apples should be tender but still hold their shape. This is the moment that matters: sprinkle the ¼ cup of light cornstarch and ½ tsp of Diamond Crystal kosher salt over the mixture. Stir immediately and let it cook for another 5-7 minutes, stirring frequently, until the filling thickens to a glossy, spoonable consistency. You'll know it's ready when it coats the back of a spoon and leaves a slight sheen.
Can the Filling for Long-Term Storage
While the filling is still hot, carefully ladle it into the 6 pint-sized Ball Mason jars, leaving about ½-inch of headspace at the top. This headspace allows for proper expansion during processing. Wipe the rims of the jars with a clean, damp cloth to remove any residue, then place the lids and bands on each jar.
Process the jars in a boiling water bath for 15 minutes. Start timing as soon as the water returns to a full rolling boil. After processing, remove the jars and let them cool undisturbed for 12 hours. This cooling period creates a vacuum seal, ensuring your filling stays fresh for up to a year in a cool, dark pantry.
Test and Store Your Homemade Filling
Once cooled, check the seals by pressing down on the center of each lid. If it doesn't pop back up, the jar is properly sealed. Store the jars in a cool, dark place and use within a year for the best quality. To use, simply open a jar and warm the filling gently in a saucepan over low heat, stirring until heated through.
This old-fashioned filling is perfect for pies, cobblers, or even as a topping for ice cream. The spices will mellow slightly over time, giving you that comforting, nostalgic flavor that reminds you of grandma's kitchen. And the best part? You'll have exactly 6 servings of this classic pantry staple ready whenever you need it.
Pro Tips For Making Old Fashioned Canned Apple Pie Filling
- Peel Apples Sparingly: The recipe calls for peeled apples, but don’t go overboard—leave a thin strip of skin near the core. That extra fiber keeps the filling from turning into mush after canning. I used to peel them completely, and the texture suffered.
- Simmer Low and Slow: After adding sugar and spices, reduce heat to a gentle simmer—no rolling boils. Too much heat breaks down the pectin in the apples, making the filling watery when canned. Think "barely bubbling," not "aggressive."
- Skip the Over-Spicing: Allspice and nutmeg are potent—start with half the recipe’s suggested amount, taste, then adjust. I’ve ruined batches by doubling them, and the filling tasted like a holiday cookie, not pie.
- Use Two Apple Types: Mix Granny Smith (tart, holds shape) with Honeycrisp (sweet, tenderizes). The Smith keeps the filling firm during canning, while the Honeycrisp adds depth. (Yes, even if you’re impatient like me—trust the combo.)
Pro cooking tips for perfect results
Apple Prep Secrets
For the best texture, slice apples ¼-inch thick using a mandoline—it ensures even cooking and prevents some slices from becoming mushy. I always peel mine, but if you're short on time, leave the skin on for extra fiber.
The key is uniformity: Granny Smith or Honeycrisp apples hold their shape best, but McIntosh or Braeburn work too if you cook them 2-3 minutes less. Tossing the slices with ½ cup lemon juice immediately prevents browning and keeps the filling bright. 🍎
Spice Freshness Matters
Ground spices lose potency quickly, so always use freshly ground cinnamon, allspice, and nutmeg—I buy them in bulk from Penzeys or toast them in a dry pan for 30 seconds to revive stale jars.
The 1 tsp allspice and ½ tsp nutmeg add depth that store-bought fillings miss. Pro tip: Mix the dry spices with the sugar before adding butter—this distributes them evenly and prevents clumping. 🌿
Thickening Like a Pro
Cornstarch is your thickening hero, but timing is everything. Sprinkle the ¼ cup cornstarch over the simmering apples and stir immediately—this prevents lumps. Cook for only 5-7 minutes after adding it, stirring constantly, until the filling reaches a glossy, spoonable consistency.
Overcooking turns it gummy, so test by coating the back of a spoon with a slight sheen. 🥄
Canning Without Fail
Leave ½-inch headspace in each jar to allow for expansion during processing. Wipe jar rims clean with a damp cloth—any residue can prevent proper sealing. Process pint jars in a boiling water bath for 15 minutes, then let them cool undisturbed for 12 hours before checking seals.
I always label jars with the date and contents—trust me, you’ll forget! 🥫
Flavor Boosters
Want extra warmth? Add 1 tsp vanilla extract to the filling before canning. For a tangy twist, swap ¼ cup of the water for apple cider. If your filling tastes too sweet after canning, balance it with ½ tsp extra lemon juice when reheating.
The spices mellow slightly over time, so use within 3 months for peak flavor. 💫
Troubleshooting Tips
If your filling weeps after opening, it’s too thin—next time, cook the cornstarch 1 minute longer. For grainy texture, blend the cooked filling briefly with an immersion blender. Store-bought fillings often separate?
This homemade version stays smooth because of the butter and proper thickening. And if jars don’t seal? Reprocess them within 24 hours for best results. ⚡
Nutrition facts
Frequently asked questions
Can I use any type of apple for this canned filling?
Granny Smith or Honeycrisp apples are ideal because they hold their shape well during canning. For softer varieties like McIntosh, reduce simmering time by 2-3 minutes to prevent mushiness. Tart apples work best—they balance the sugar beautifully.
How do I know when the filling is thick enough?
Test it by coating the back of a spoon—it should leave a slight sheen without being sticky. If it's too thin, cook for another 1-2 minutes while stirring constantly. Over-thickening makes it gummy, so aim for that glossy, spoonable consistency.
Can I substitute cornstarch with flour?
No—cornstarch creates a smoother, clearer filling than flour. Flour thickens more slowly and can make the filling cloudy or grainy. For a quick fix, mix 1 tbsp cornstarch with 1 tbsp flour, but use half the amount of the original recipe.
Why did my jars not seal properly?
Check for these common issues: headspace too small (must be ½-inch), dirty jar rims, or under-processing. Reprocess unsealed jars within 24 hours for best results. If they still don't seal, refrigerate and use within 5-7 days.
How long will the filling keep in the pantry?
Properly sealed jars last 12-18 months in a cool, dark place. For peak flavor, use within 3-6 months. The spices mellow over time, but the filling remains safe indefinitely. Always check seals before opening.