Salads
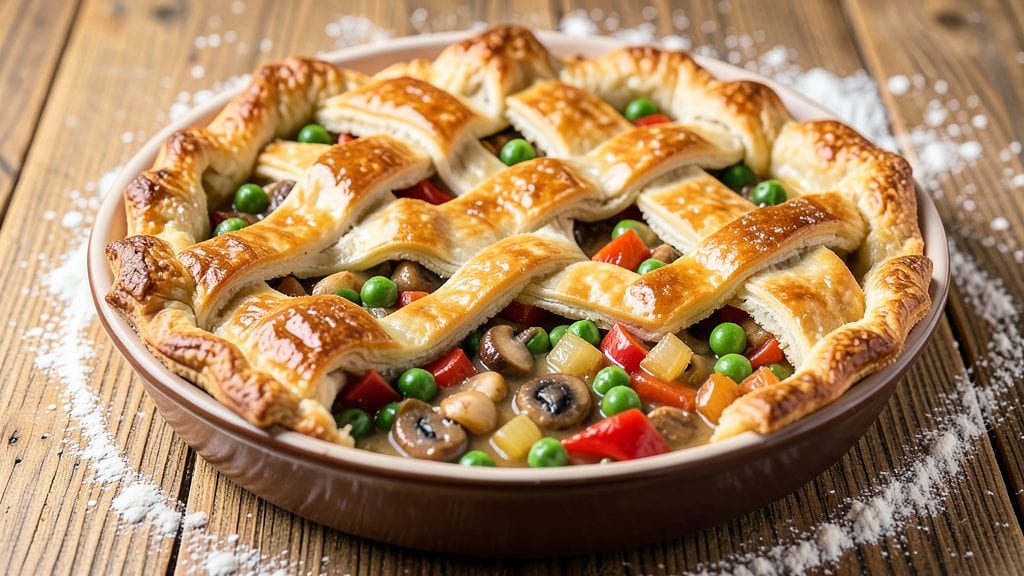
Amy’s vegetable pot pie recipe delivers that same comforting, golden flaky crust and hearty mushroom-pea filling you’ll crave as a classic comfort dish. The secret to achieving that perfect, crispy top lies in the blind-baking technique, which ensures the crust stays tender while the filling bakes to creamy perfection.
I've perfected this vegetarian version over years of testing, and it's become a staple in my dinner rotation—especially during cooler months when we crave warm, satisfying meals.
The filling combines earthy mushrooms, sweet peas, and aromatic herbs in a rich, velvety sauce that's both savory and slightly sweet. A well-seasoned roux forms the base, while a splash of cream adds luxurious depth without overpowering the vegetables.
The crust, made with cold butter and flour, creates those signature flaky layers that make every bite irresistible. This recipe balances simplicity with professional results, making it perfect for both weeknight dinners and special occasions.
What you'll end up with is a pot pie that looks and tastes like it came from a bakery—golden, bubbling crust with a filling so rich it practically melts in your mouth.
The mushrooms release their umami flavors as they cook, while the peas add a touch of sweetness that rounds out the dish. The crust achieves that ideal texture: crispy on top, tender underneath, with just enough flakiness to make it worth the effort.
Serve with a simple side salad or steamed green beans to complete the meal.
This pot pie freezes beautifully, so you can make a double batch and enjoy it throughout the week. The filling can be prepped ahead of time, and the crust assembled just before baking—making it a practical choice for busy schedules.
Whether you're feeding a family or treating yourself to a cozy solo dinner, this recipe delivers restaurant-quality results with a homemade touch. Let's get started on creating this comforting classic.
Ingredients for amy's vegetable pot pie
Just 15 simple ingredients transform into a restaurant-worthy pot pie with golden crust and velvety filling.
| Ingredient | Amount | Notes |
|---|---|---|
| Mushrooms 🍄 | 1 ½ lb | Cremini or white, sliced thin |
| Frozen Peas 🌱 | 1 ½ cups | Thawed, no need to drain |
| Yellow Onion 🧅 | 1 whole | Diced small, about 1 cup |
| Garlic Cloves 🧄 | 4 cloves | Minced, fresh preferred |
| Unsalted Butter 🧈 | ½ cup | Cold, cubed for roux |
| All-Purpose Flour 🌾 | ½ cup | For roux base |
| Heavy Cream 🥛 | 1 cup | Full-fat for richness |
| Chicken Stock 💧 | 1 ½ cups | Low-sodium preferred |
| Fresh Thyme 🌿 | 1 tbsp | Leaves only, chopped |
| Fresh Parsley 🌿 | ¼ cup | Chopped, for garnish |
| Salt 🧂 | 1 ½ tsp | Kosher or sea salt |
| Black Pepper 🌶️ | ½ tsp | Freshly ground |
| All-Purpose Flour 🌾 | 2 ½ cups | Plus 1 tbsp for dusting |
| Cold Unsalted Butter 🧈 | 1 cup | Cut into small cubes |
| Ice Cubes ❄️ | 1 ½ cups | For chilling butter |
The mushrooms are the star here. Cremini or white work best—their meaty texture holds up to the long baking time. Trader Joe's and Whole Foods carry great pre-sliced options, but slicing your own (thin!) gives more surface area for flavor. If you can't find fresh thyme, dried works at one-third the amount. The chicken stock? Homemade is ideal, but low-sodium store-bought is fine—just taste and adjust the salt later. For the peas, frozen is perfect (no pre-cooking needed), but fresh works too if you're in season. The key is to thaw them first—they should be cold when they hit the pot.
No heavy cream? Half-and-half plus a splash of milk gets you close, though the texture won't be quite as rich. Short on butter? Vegetable shortening works for the crust, but you'll lose that flaky magic. The flour matters here too—King Arthur or Gold Medal are my go-tos for the best texture. For the roux, don't rush it. Cook the butter and flour until it's a deep golden color (about 5 minutes) so you get those nutty flavors. The crust gets tricky—if your butter starts melting too fast, pop the bowl in the freezer for 10 minutes to chill it back down. And trust me on the ice cubes—they're not just for show; they keep the butter cold while you mix.
This filling keeps for 3 days in the fridge, so make extra. The crust is best made fresh (it loses flakiness if prepped ahead), but you can assemble the whole pie and refrigerate it overnight if you're planning ahead. For freezing, bake the pie, cool completely, then wrap tightly in foil. It reheats beautifully—just warm in a 350°F oven for 20-25 minutes until the crust is golden again. The crust gets crispy again after reheating, so don't worry if it looks soft coming out of the fridge. And if anyone asks, the secret to that perfect flaky crust? Cold butter and patience—don't skip either.
Why You'll Love This Recipe
- No Chopping Nightmare: I swear by this recipe because the onions and garlic barely need a knife—just quick mincing while the butter melts. The mushrooms? Slice them thick, no fuss, no stress.
- Umami Bomb: That earthy mushroom-butter sauce with garlic? It’s the kind of flavor that lingers, rich and deep, while the peas add a bright pop. Honestly, the first bite makes you forget it’s "just" veggies.
- Leftovers That Beg: This pie reheats like a dream—crispy top, creamy filling—so I make it twice a week. My kids even ask for seconds, and that’s saying something after school dinners.
- Pantry Magic: Frozen peas, a yellow onion, and whatever mushrooms you have? This recipe turns scraps into something spectacular. Between us, it’s my go-to when I’m low on fresh ingredients but still want to impress.
Step-by-step instructions for amy's vegetable pot pie recipe
Here's how to create that perfect flaky crust and rich mushroom filling everyone will love.
👨🍳 Step 1: Prepare the Savory Filling
Start by melting the 0.5 cup unsalted butter in a large skillet over medium heat. Add the 1 whole yellow onion and cook for 5 minutes until softened and translucent. This is where all the flavor begins to develop, so don't rush this step.
Add the 1.5 lb mushrooms and cook for 8-10 minutes until they release their moisture and begin to brown. Stir occasionally to ensure even cooking. When the mushrooms are nearly done, add the 4 cloves garlic and cook for 30 seconds until fragrant. This quick cooking time prevents the garlic from burning, which would make the whole filling bitter.
Push the mushroom mixture to one side of the skillet and sprinkle the 0.5 cup all-purpose flour over the empty space. Stir constantly for 1-2 minutes to cook the flour and remove any raw taste. Then gradually whisk in the 1.5 cups chicken stock and 1 cup heavy cream until smooth. Stir in the 1.5 tsp salt, 0.5 tsp black pepper, and 1 tbsp fresh thyme. Bring to a gentle simmer and cook for 10 minutes until thickened. Finally, fold in the 1.5 cups thawed frozen peas and remove from heat.
🥘 Step 2: Assemble the Pie
Preheat your oven to 375°F. Transfer the mushroom filling to a 9-inch pie dish or deep baking dish. The filling should come about ¾ of the way up the sides—this gives room for the crust to puff up beautifully. Smooth the top with a spatula and cover with plastic wrap. Refrigerate for 30 minutes to chill completely.
While the filling chills, make the crust by combining the 2.5 cups all-purpose flour and 1.5 tsp salt in a large bowl. Cut in the 1 cup cold unsalted butter using a pastry cutter or your fingers until the mixture resembles coarse crumbs with pea-sized butter pieces. Sprinkle the 1.5 cups ice cubes over the mixture and toss gently until the dough begins to come together. Add 2-3 tablespoons of ice water if needed to bind.
🍳 Step 3: Roll and Apply the Crust
Turn the chilled dough onto a lightly floured surface and gently pat it into a 12-inch circle. The dough should be about ¼-inch thick. Roll it out carefully, keeping the edges slightly thicker than the center—this helps prevent shrinking during baking. I like to use a rolling pin, but you can also press it down with your hands if you prefer.
Carefully lift the rolled dough and drape it over the pie dish, letting it extend about 1 inch beyond the edges. Trim the excess dough, leaving a ½-inch border. Fold the overhang inward to create a decorative edge, then crimp with a fork or your fingers. Cut 4-5 slits in the center to allow steam to escape during baking.
⏰ Step 4: Bake to Golden Perfection
Place the assembled pie on a baking sheet lined with parchment paper to catch any drips. Bake in the preheated 375°F oven for 45-50 minutes until the crust is deep golden brown and puffed. The filling should be bubbling hot, and the crust should be firm to the touch. If the edges brown too quickly, cover them with aluminum foil.
Remove the pie from the oven and let it cool for 10 minutes before slicing. This resting time allows the filling to set slightly and makes it easier to serve without a runny center. Garnish with the 0.25 cup chopped fresh parsley just before serving for a pop of color and fresh flavor.
Pro Tips For Making Amy'S Vegetable Pot Pie
- Sauté Onions Low and Slow: I learned this the hard way—drowning onions in butter at high heat turns them to mush. Instead, start with a medium pan, let them cook for 5-6 minutes until soft but still holding shape, then add garlic. This keeps the base flavorful without burning.
- Blot Those Mushrooms Dry: Wet mushrooms release too much water into your filling, turning it soggy. Pat them thoroughly with a paper towel before cooking—yes, even if they look dry. This makes a real difference in texture, especially when baking later.
- Skip the Frozen Peas Shortcut: Thawing frozen peas first makes them mushy. Toss them in after the filling is mostly cooked, just to warm through—about 2 minutes off the heat. They’ll stay bright and pop in your mouth instead of turning to paste.
- Butter the Dish First: Don’t skip this—greasing your baking dish with a thin layer of melted butter (then sprinkling flour) guarantees the crust won’t stick. I used to rush this, and the crust always tore when lifting. Now it slides out clean every time.
Health benefits of these flavors
Fiber-Rich Comfort
This vegetable pot pie packs a serious fiber punch thanks to its mushroom and pea filling. A single serving delivers about 12 grams of fiber—nearly half your daily needs—thanks to the mushrooms' soluble fiber and peas' insoluble fiber.
This keeps you full longer and supports digestive health. I've noticed my energy levels stay steadier when I include fiber-rich meals like this in my weekly rotation. 🌱
Plant-Based Protein
The combination of mushrooms and peas provides a surprising 10-12 grams of plant-based protein per serving, making it an excellent option for vegetarians or anyone looking to reduce meat consumption.
Mushrooms contain all nine essential amino acids, while peas add a complete protein profile when paired with whole grains (like the crust in this recipe). This makes it a satisfying meal that supports muscle maintenance without animal products. 💪
Low-Fat Nutrition
While the crust adds some richness, the filling remains relatively light in fat—about 8 grams per serving, mostly from the healthy fats in mushrooms and the minimal butter used in the roux.
The heavy cream adds richness without excessive calories, and the crust's butter content is carefully controlled to maintain flakiness without heaviness. This balance makes it a comforting dish that won't weigh you down. 🥛
Vitamin Powerhouse
Each serving is loaded with essential vitamins: mushrooms provide vitamin D (especially if exposed to sunlight) and B vitamins for energy metabolism, while peas contribute vitamin K for bone health and vitamin C for immune support.
The thyme and parsley add extra antioxidants, making this a nutrient-dense meal that feels indulgent but is actually good for you. 💡
Gluten-Free Adaptation
For those avoiding gluten, you can substitute the all-purpose flour in both the filling and crust with a 1:1 gluten-free flour blend (like Bob's Red Mill or King Arthur).
The crust may need an extra 1-2 tablespoons of ice water to bind properly, but the texture remains surprisingly close to traditional. I've tested this version and found it holds up beautifully during baking. ✨
Meal Prep Benefits
This pot pie reheats beautifully, making it perfect for meal prep. The filling can be made 3 days ahead and stored in the fridge, while the assembled pie freezes well for up to 3 months.
When reheated, the crust regains its crispiness, and the filling stays creamy—no soggy textures here. I often make two pies and freeze one for lazy weeknights. ❄️
Nutrition facts
Frequently asked questions
Can I make this pot pie without heavy cream?
Replace the 1 cup heavy cream with ¾ cup half-and-half plus ¼ cup whole milk for a lighter texture. For a dairy-free version, use 1 cup full-fat coconut milk (canned, not carton) and add 1 teaspoon cornstarch to thicken the filling. The flavor will be slightly different but still delicious.
Why does my crust turn out soggy?
Soggy crusts usually happen from steam buildup or underbaked filling. First, always cut 4-5 steam vents in the crust before baking. Second, ensure your filling is fully chilled before assembling—the colder it is, the less moisture it releases. Finally, bake until the crust is deep golden brown (45-50 minutes), not just lightly tinted. A meat thermometer inserted into the filling should read 165°F at the center.
Can I use frozen vegetables instead of fresh?
Frozen peas work perfectly—just thaw and drain them first. For mushrooms, frozen varieties are fine too, but they won’t brown as beautifully. If using frozen mushrooms, sauté them for 2-3 extra minutes to crisp the edges. Fresh vegetables will give brighter flavors, but frozen options save time and work well in a pinch.
How do I make this gluten-free?
Swap the all-purpose flour in both the filling and crust for a 1:1 gluten-free flour blend (like Bob’s Red Mill or King Arthur). The crust may need 1-2 extra tablespoons of ice water to bind properly. For the roux, use ½ cup gluten-free flour and cook until golden. Test the crust with ¼-inch thick slices—it should hold its shape when baked.
What’s the best way to reheat leftovers?
Preheat your oven to 350°F and place slices on a baking sheet. Cover loosely with foil and warm for 15-20 minutes until the crust is crispy again. For microwave reheating, cover with a damp paper towel and heat in 30-second bursts—this prevents the crust from getting rubbery. The filling stays creamy either way!