Breakfast & Brunch
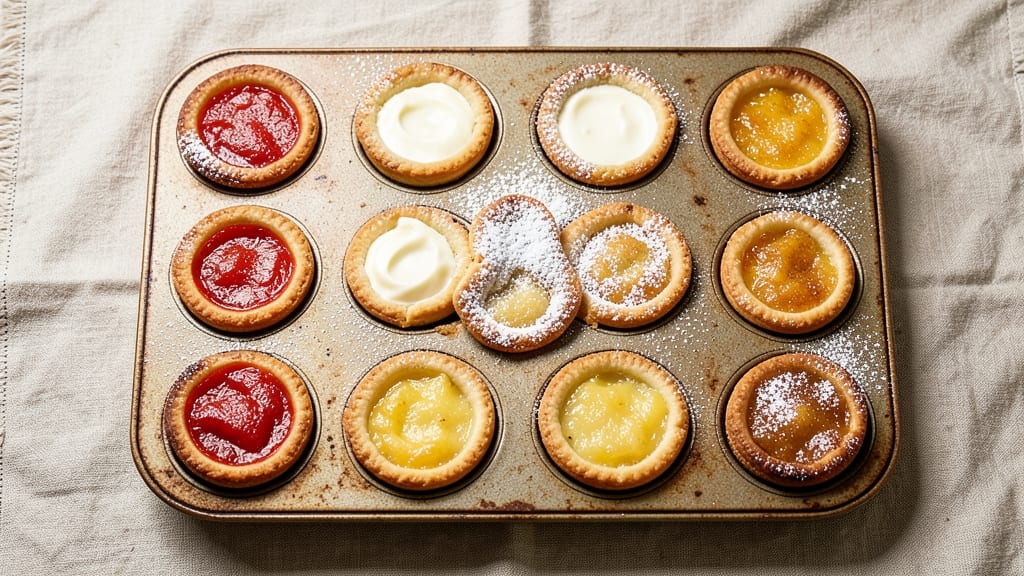
Creating muffin tin mini pies transforms ordinary fruit into elegant, handheld desserts with minimal effort. These bite-sized treats deliver the perfect balance of a flaky, buttery crust and a gooey, flavorful center—ideal for breakfast, brunch, or even a sophisticated dessert.
The secret lies in using a simple, foolproof crust and letting the natural sweetness of the fruit shine through.
This recipe works with store-bought or homemade crust, giving you flexibility for any occasion. Whether you prefer classic apple, peach, or even savory options like cheese and chive, the muffin tin method ensures even baking and crisp edges every time.
The process is straightforward: prepare the filling, assemble the pies, and bake until golden brown.
What you’ll end up with is a tray of perfectly portioned mini pies that look and taste like they came from a bakery. The crust stays crisp, the fruit filling remains tender and slightly caramelized, and the aroma filling your kitchen will have everyone asking for seconds.
These pies are perfect for entertaining, meal prep, or satisfying a sweet craving.
Once you master this technique, you can experiment with different fillings—from berry compotes to custard-based options. The possibilities are endless, making these mini pies a versatile addition to any menu. Let’s get started on creating these delicious treats!
Ingredients for muffin tin mini pies
Twelve perfect mini pies with buttery crusts and gooey fruit centers—no rolling required.
| Ingredient | Amount | Notes |
|---|---|---|
| All-Purpose Flour 🌾 | 2 ½ cups | Sifted for light texture |
| Cold Unsalted Butter 🧈 | 1 cup | Cubed, full-fat preferred |
| Granulated Sugar 🍚 | ¼ cup | White or light brown |
| Ice Water 💧 | ½ cup | Chilled, for dough |
| Salt 🧂 | ½ tsp | Fine sea salt |
| Fresh Lemon Juice 🍋 | 1 tbsp | Brightens fruit filling |
| Granulated Sugar 🍚 | 1 cup | For fruit filling |
| Cornstarch 🌾 | 2 tbsp | Thickens filling |
| Fresh Apple Pieces 🍎 | 2 cups | Diced, skin on |
| Cinnamon 🌿 | 1 tsp | Ground, for warmth |
| Vanilla Extract 🍯 | ½ tsp | Pure, high-quality |
| Egg 🥚 | 1 whole | For egg wash |
| Turbinado Sugar 🍚 | 2 tbsp | Coarse, for topping |
The butter is non-negotiable here—European-style unsalted butter like Plugrá or Land O’Lakes makes the crust flakier. Buy it in the freezer section to keep it cold until use. If you're short on time, store-bought pie crust works too, but homemade gives that bakery feel. For the apples, Granny Smith or Honeycrisp hold up best during baking. Toss them with lemon juice right away to prevent browning—trust me, it saves time later. The cinnamon should be fresh ground if possible, but regular ground works in a pinch.
No cornstarch? Arrowroot powder at the same amount does the trick. Short on vanilla? Almond extract at half the amount adds depth, but stick to vanilla for classic flavor. The dough needs to stay cold—chill it 30 minutes before rolling if your kitchen’s warm. For a savory twist, swap fruit for sharp cheddar and chives, but keep the crust ratio the same. If you’re making these ahead, bake them cold and reheat at 350°F for 5 minutes to restore crispness.
These keep beautifully—3 days at room temperature if stored in an airtight container, or 1 week in the fridge. For freezing, bake them first, then store in a single layer before transferring to a bag. Reheat frozen pies directly from the freezer at 375°F for 8-10 minutes. The secret to perfect mini pies? Don’t overfill—the crust needs room to puff. I always make a double batch—half for now, half for later.
Why You'll Love This Recipe
- No-Fuss Crust: I swear by the cold butter trick—just toss those cubes into the flour with your fingers until it looks like wet sand, then add ice water. No mixer, no stress, and that flaky magic happens every time. (Yes, even on a Tuesday night.)
- Sweet Crispy Edge: That sugar in the dough? It caramelizes just enough to give these mini pies a buttery, golden snap—like a cross between a cookie and a pie crust. One bite and you’ll understand why I keep making them.
- Party in a Tin: Between us, these are my secret weapon for gatherings. Freeze half the batch, and when guests show up, just pop them in the oven. No last-minute baking panic, just warm, flaky perfection that disappears faster than you can say "second round."
- Budget-Friendly Magic: Four ingredients, zero waste. The dough stretches to fill a dozen tins, and leftovers? They reheat like a dream. I’ve fed a crowd for under $10—flaky, sweet, and no one questions how cheap it was.
Step-by-step instructions for muffin tin mini pies
Here's how to create perfectly buttery crusts with gooey apple centers—every step ensures crisp edges and tender fruit.
Prepare the Dough for Crispy Crusts
In a large mixing bowl, combine the 2.5 cups all-purpose flour, 0.5 teaspoon salt, and 0.25 cup granulated sugar. Whisk until evenly distributed—this ensures uniform texture throughout the dough. Cut in the 1 cup cold unsalted butter using a pastry cutter or your fingers until the mixture resembles coarse crumbs with pea-sized butter pieces remaining.
Add the 0.5 cup ice water gradually, mixing just until the dough comes together. Avoid overworking—handle it gently to prevent gluten development, which would make the crust tough. Divide the dough into two equal discs, wrap in plastic wrap, and chill for at least 1 hour (or up to 24 hours). This resting period is crucial for developing flavor and achieving that signature flaky texture.
Assemble the Mini Pies with Precise Layers
Preheat your oven to 375°F and grease a 12-cup muffin tin lightly with butter or nonstick spray. Roll out one chilled dough disc on a floured surface to 1/8-inch thickness. Using a 2.5-inch round cutter (or a glass of similar size), cut out 12 circles—you should have enough dough for 12 pies with minimal scraps.
Press each dough circle gently into a muffin cup, forming the sides slightly upward to create a small well. In a separate bowl, mix the 2 cups fresh apple pieces, 1 cup granulated sugar, 2 tablespoons cornstarch, 1 teaspoon cinnamon, and 0.5 teaspoon vanilla extract until the apples are lightly coated. Spoon 1 tablespoon of filling into each prepared crust, mounding it slightly in the center. The filling should be generous but not overflowing—leave about 1/4-inch of space at the top for the top crust.
Create the Top Crust and Seal the Pies
Roll out the second dough disc to the same 1/8-inch thickness and cut out 12 additional circles. Place one on top of each pie, pressing gently to seal the edges. Use a fork to crimp the edges, creating a decorative pattern while ensuring a good seal. This prevents filling from leaking during baking and creates that classic pie crust texture.
Brush the tops of the mini pies with the 1 whole egg, beaten lightly with 1 tablespoon fresh lemon juice. This egg wash adds shine and a golden finish. Sprinkle each pie with a pinch of turbinado sugar for a touch of caramelization and crunch. The sugar will melt slightly during baking, creating beautiful golden spots on the crust.
Bake to Golden Perfection
Bake the mini pies in the preheated 375°F oven for 20-25 minutes, until the crusts are deep golden brown and the filling is bubbling at the edges. Rotate the muffin tin halfway through baking to ensure even heat distribution—this prevents any one side from over-browning.
You'll know they're done when the crusts are crisp and the filling is thickened but still slightly jiggly in the center. If the tops brown too quickly, tent the muffin tin with aluminum foil for the last 5 minutes of baking. Remove from the oven and let the pies cool in the tin for 5 minutes before transferring to a wire rack. Serve warm for the best texture—crisp crusts with a gooey, spiced apple center that melts in your mouth.
Pro Tips For Making Muffin Tin Mini Pies
- Chill the Butter Hard: Pop that unsalted butter in the freezer for 15 minutes before cutting—no one wants to deal with greasy dough that sticks to your fingers. I learned this the hard way when my first batch turned into a sad, crumbly mess because the butter warmed up too fast.
- Cut Butter in Small Bites: Use a fork or your fingers to break the cold butter into pea-sized pieces before mixing with flour. This ensures even distribution and prevents pockets of butter that’ll make your mini pie crusts soggy instead of flaky. (Yes, even if you’re impatient like me.)
- Press Dough Gently: When shaping the dough into the muffin tin, press it lightly—just enough to fill the cups without compacting it. Overworking the dough here makes the crust tough, and no one wants a mini pie that feels like eating a cracker. A quick press and a light crimp is all it takes.
- Pre-Bake the Crusts: Bake the crusts alone for 5-7 minutes at 375°F (190°C) before adding filling—this gives them structure so they don’t collapse under the weight of fruit or custard. I was skeptical until I tried it; now I can’t imagine skipping this step. (Your future self will thank you.)
Essential equipment for this recipe
Muffin Tin Essentials
A 12-cup standard muffin tin is your best friend for these mini pies—look for one with non-stick coating or made from heavy-duty aluminum like Wilton or USA Pan. The cups should be 2.5 inches deep to accommodate the layers without overflowing.
If your tin has removable bottoms, even better—it makes cleanup a breeze. I’ve used ceramic muffin tins too, but they require more frequent greasing to prevent sticking. 🧑🍳
Dough Tools Matter
For the crust, a pastry cutter (like the OXO Good Grips) or your fingers work perfectly for cutting butter into flour. A rolling pin with a non-stick surface (I love the Norpro Solid Wood) prevents dough from sticking when rolling to 1/8-inch thickness.
If you’re short on time, a pizza dough roller speeds up the process without crushing the dough. For cutting circles, a 2.5-inch round cutter or a glass of the same size works—just dip it in flour between cuts to keep the dough from sticking. 🍞
Precision Cutters
A cookie cutter or flour-dusted glass is ideal for cutting dough circles, but a sharp paring knife works in a pinch. For sealing the edges, a fork is perfect—press gently to create a decorative crimp.
If you want a smoother finish, use a small offset spatula to press the edges together. For the egg wash, a pastry brush (like Westcott’s Silicone Brush) ensures even coverage without making a mess. 🎨
Baking Gear
An oven thermometer (I recommend Thermoworks Thermapen) is a game-changer—it ensures your oven is truly at 375°F, preventing under- or over-baking. A wire cooling rack keeps pies from sitting in grease, while a small offset spatula helps transfer them safely.
For reheating, a microwave-safe plate or oven-safe dish works best. If you’re freezing pies, parchment-lined baking sheets prevent sticking during the initial bake. ⏰
Optional Upgrades
For extra flair, a piping bag with a small round tip lets you add decorative touches like lattice patterns or swirls on top. A food processor speeds up dough prep if you’re making a double batch.
If you’re feeling fancy, a mini pie server (like Wilton’s) makes plating effortless. For storage, airtight containers with parchment between layers keep pies fresh for days. 💫
Nutrition facts
Frequently asked questions
Can I use store-bought pie crust instead of making homemade dough?
Store-bought crust works perfectly for these mini handheld treats. Use a 12-ounce refrigerated pie crust (like Pillsbury) and roll it to 1/8-inch thickness. Cut circles with a 2.5-inch cutter and press gently into the muffin tin. Just be sure to pre-bake the bottom crust for 3-4 minutes at 375°F before adding filling to prevent sogginess.
What are the best fruit options besides apples?
These mini pies shine with seasonal fruits! Try peaches or berries for summer, pears or rhubarb in spring, or cherries for a rich twist. For a savory version, swap fruit for sharp cheddar and chives or caramelized onions. Just adjust sugar in the filling—berries need 1/4 cup less while stone fruits may need 1 extra tablespoon of cornstarch for thickness.
Why did my crust turn out puffy instead of flat?
This happens when the dough isn't chilled enough or the filling is too full. For crisp, flat tops, ensure your dough rests at least 1 hour in the fridge. Also, leave 1/4-inch of space between the filling and top crust. If your oven runs hot, tent with foil after 15 minutes to prevent over-browning while the center cooks through.
How do I prevent the filling from leaking during baking?
Proper sealing is key! After adding filling, press the top crust firmly around the edges with your fingers or a fork. For extra insurance, chill the assembled pies in the fridge for 15-20 minutes before baking. If you notice leaks during baking, rotate the tin immediately to distribute heat evenly. The filling should thicken as it bakes, but if it's still runny, your oven may need 5 more minutes at a lower temp.
Can I make these ahead of time?
Yes! These mini pies freeze beautifully. Bake them completely, then cool to room temperature. Place in an airtight container with parchment between layers. They'll keep for 3 months in the freezer. Reheat from frozen at 375°F for 8-10 minutes until warmed through. For short-term storage, keep them at room temp for 3 days or refrigerated for 1 week—just reheat for 5 minutes in the oven to restore crispness.