Desserts
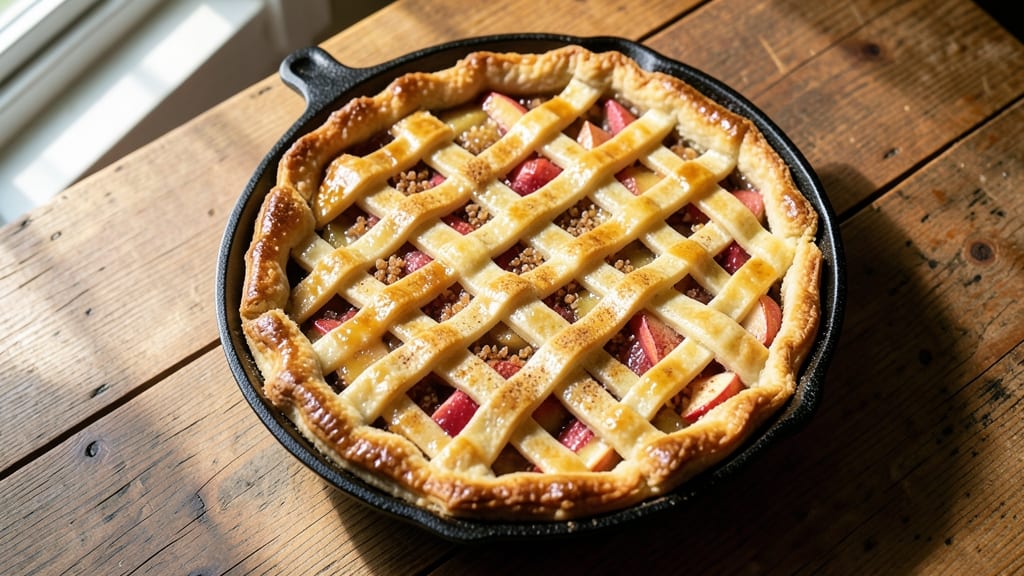
Betty Crocker's old-fashioned apple pie recipe delivers the kind of homestyle dessert that tastes like autumn in every bite. The secret lies in a perfectly balanced buttery crust that flakes like pages from an old cookbook, paired with a filling so tender it practically melts.
I've baked this version dozens of times—each slice brings back memories of grandma's kitchen, where cinnamon and nutmeg filled the air long before the pie came out of the oven.
The magic starts with the crust: cold butter cut into the flour until it resembles coarse crumbs, then just enough ice water to hold it together without overworking. This foolproof technique ensures layers that separate beautifully, creating that signature flakiness.
The filling combines tart apples with a touch of sugar and spice, baked until bubbly but still holding its shape when sliced. No one will believe it's made at home.
What you'll end up with is a pie that smells like comfort—warm spices, caramelized fruit, and that unmistakable buttery aroma. The crust stays crisp around the edges while remaining tender in the center, and the filling releases juices that create a golden, bubbling lattice.
This isn't just dessert; it's a centerpiece for family gatherings, holiday tables, or quiet Sunday afternoons.
Serve it warm with a scoop of vanilla ice cream or a dollop of whipped cream, and you've got a dessert that feels like coming home. The recipe scales perfectly for crowds, and leftovers—if there are any—taste even better the next day.
Let's get baking this classic that never goes out of style.
Ingredients for betty crocker old fashioned apple pie
Classic crust and filling ingredients that taste like autumn memories.
| Ingredient | Amount | Notes |
|---|---|---|
| All-Purpose Flour 🌾 | 3 cups | Sifted for light texture |
| Unsalted Butter 🧈 | 1 cup | Cold, cut into pieces |
| Granulated Sugar 🍚 | ½ cup | White or light brown |
| Granny Smith Apples 🍎 | 6 medium | Peeled and thinly sliced |
| Light Brown Sugar 🍚 | ¾ cup | Packed firmly |
| Ground Cinnamon 🌿 | 2 tbsp | Freshly ground preferred |
| Ground Nutmeg 🌿 | ½ tsp | Freshly grated for warmth |
| Salt 🧂 | ½ tsp | Kosher or sea salt |
| Lemon Juice 🍋 | 2 tbsp | Freshly squeezed |
| Ice Water 💧 | ¼ cup | Chilled for crust binding |
| Vanilla Ice Cream 🍦 | 1 ½ cups | For serving |
The butter is non-negotiable—European-style or unsalted works best for that rich, flaky texture. Store-brand butter from Kroger or Walmart cuts costs without sacrificing quality, but avoid salted varieties. For apples, Granny Smiths provide tartness that balances the sweetness, but Honeycrisp or Braeburn work too. Buy them firm and store them in the fridge until ready to slice. The cinnamon should smell vibrant—if it's stale, toast it briefly in a dry pan to revive the aroma. Nutmeg is trickier; pre-ground loses potency fast, so consider grating it fresh from a whole nut if you're ambitious.
No Granny Smiths? McIntosh or Golden Delicious add sweetness that pairs beautifully with the spices. Short on brown sugar? White sugar plus 1 tsp molasses mimics the moisture content. The crust can handle substitutions too—half whole wheat flour works if you prefer, though it'll be slightly denser. For a gluten-free version, swap the all-purpose flour for a 1:1 GF blend. The ice water is crucial; room-temperature water will make the dough sticky and tough. If your butter melts during mixing, chill the dough for 30 minutes before rolling.
Store dough in airtight wrap between layers of parchment for up to 48 hours—it keeps better than you'd think. The filling can be prepped a day ahead and refrigerated in an airtight container. For make-ahead pies, assemble completely (including egg wash) and refrigerate overnight—bake straight from the fridge for an extra-crisp crust. Leftovers reheat beautifully in a 350°F oven for 10 minutes, covered with foil. Freeze slices wrapped individually for up to 3 months—they reheat like a dream.
Why You'll Love This Recipe
- No-Roll Crust Shortcut: I swear by this recipe’s trick—just mix cold butter into flour until it looks like wet sand, then press it into the pan. No chilling, no fuss, and it still holds together like a dream. Honestly, it’s the kind of hack that makes me feel like a baking genius.
- Tart-Sweet Magic: Granny Smiths and light brown sugar? That’s the combo that makes this pie ridiculously good. The apples stay firm but juicy, and the crust’s buttery crunch cuts through the sweetness like a perfect balance. It’s the kind of flavor that disappears too fast from the plate.
- Weeknight or Holiday: Between us, this pie works for everything. Need a quick dessert after dinner? Done. Bringing something to Thanksgiving? Perfect. Even my picky teenage nephew asks for seconds—(yes, even on a Tuesday night). It’s my go-to for any occasion without the stress.
- Leftovers That Win: One pie lasts us four days, and every slice tastes just as good reheated with a scoop of vanilla ice cream. Plus, the recipe’s budget-friendly—you’re using pantry staples, not specialty ingredients. It’s the kind of dessert that saves money and makes you look like a star.
Step-by-step instructions for Betty Crocker's old-fashioned apple pie
Here's how to assemble a classic apple pie with a flaky crust and perfectly spiced filling.
Prepare the Classic Pie Crust
In a large bowl, combine the 3 cups all-purpose flour and 0.5 teaspoon salt. Cut in the 1 cup unsalted butter using a pastry cutter or your fingers until the mixture resembles coarse crumbs with pea-sized butter pieces remaining. This texture is crucial for a flaky crust.
Add 0.25 cup ice water gradually, mixing just until the dough begins to come together. Avoid overworking it—press the dough into a ball, then divide it into two equal portions. Shape each portion into a disk, wrap in plastic wrap, and refrigerate for at least 30 minutes. Chilled dough is easier to roll and less likely to shrink during baking.
Assemble the Apple Filling
In a large mixing bowl, combine the 6 peeled and thinly sliced Granny Smith apples, 0.5 cup granulated sugar, 0.75 cup light brown sugar, 2 tablespoons ground cinnamon, 0.5 teaspoon ground nutmeg, and 0.5 teaspoon salt. Toss gently to coat the apples evenly with the spice mixture. The apples should glisten slightly from the sugar and spices.
Transfer the apple mixture to a medium saucepan and cook over medium heat for 5-7 minutes, stirring occasionally, until the apples begin to soften but still retain their shape. Remove from heat and stir in the 2 tablespoons lemon juice. This step prevents the filling from becoming too watery during baking. Let the filling cool completely before assembling the pie.
Roll and Fit the Crust
On a lightly floured surface, roll out one of the chilled dough disks into a 12-inch circle, about 1/8-inch thick. Transfer the dough to a 9-inch pie dish, pressing it gently into the bottom and up the sides. Trim any excess dough hanging over the edge, leaving about 1/2-inch overhang. This will help create a sealed crust.
Pour the cooled apple filling into the prepared crust, mounding it slightly in the center. The filling should come up to about 1/2-inch from the top edge of the crust. Dampen the overhanging edge of the bottom crust with water using a pastry brush, then roll out the second dough disk and place it over the filling. Press the edges together to seal, then crimp decoratively using your fingers or a fork.
Bake to Golden Perfection
Preheat your oven to 375°F. Cut several small slits in the top crust to allow steam to escape—this prevents a soggy bottom. Place the pie on a baking sheet lined with parchment paper to catch any drips. Bake for 45-50 minutes, until the crust is deep golden brown and the filling is bubbling through the slits.
For the last 10 minutes of baking, place a baking sheet on the lower oven rack and pour 1/2 cup ice water into it. This creates steam that helps crisp the crust. Remove the pie from the oven and let it cool on a wire rack for at least 2 hours before slicing. This resting period allows the juices to set, ensuring clean slices every time.
Serve with Vanilla Ice Cream
Slice the pie into 8 equal wedges using a sharp knife and a gentle sawing motion. Serve each slice warm with 1.5 cups vanilla ice cream on the side. The contrast between the warm, spiced apple filling and the cool ice cream creates the perfect balance of flavors. Enjoy immediately for the best texture and taste.
Pro Tips For Making Betty Crocker Old Fashioned Apple Pie
- Chill the Dough: DESCRIPTION: The Betty Crocker recipe calls for cold butter in the crust, but I learned the hard way—rolling it out too soon makes the flaky layers disappear. Wrap the dough in plastic and refrigerate for at least 30 minutes before rolling. If you’re impatient (like me), freeze it for 15 minutes instead—just don’t skip this step.
- Toss Apples Like a Pro: DESCRIPTION: Granny Smiths get mealy fast, and the recipe’s sugar won’t save them. Toss the sliced apples with 1 tablespoon of lemon juice right after cutting—this keeps them bright and prevents that sad, mushy texture. No lemon? A splash of vinegar works in a pinch.
- Don’t Overfill the Crust: DESCRIPTION: The recipe’s filling looks generous, but packing it too tightly forces juice everywhere when baking. Spoon the filling into the crust loosely—it’ll settle as it cooks. Press the top crust down gently, then crimp the edges before cutting slits. Less stress = fewer leaks.
- Bake Low and Slow: DESCRIPTION: Preheat to 375°F (the recipe’s temp), but resist the urge to crank it higher for faster browning. The crust needs time to crisp without burning while the apples soften. If the edges brown too fast, tent foil loosely over the top crust after 20 minutes—just don’t let it steam too much, or the filling gets soggy.
Common mistakes when making perfect results
Overworking the Dough
I see this mistake all the time—especially with beginners—and it’s the fastest way to kill that perfect flaky texture. The moment you start kneading or pressing the dough too much, the gluten develops, turning your crust tough instead of tender.
Remember, the goal is to mix just until the dough begins to come together, not until it’s smooth. Work quickly and keep your hands cold if they start to warm up. 🧑🍳
Skipping the Chill
If you roll out the dough right after mixing, it’ll shrink during baking and lose that beautiful shape. Always refrigerate the dough for at least 30 minutes (up to 2 hours for best results).
This also helps the butter stay firm, which is key for those signature layers. Pro tip: Place the dough between two sheets of parchment paper before chilling—it’s easier to roll out later.
Using Warm Butter
Cold butter is non-negotiable for a flaky crust. If your butter melts during mixing, your crust will turn out greasy and dense. Keep your butter in the fridge until you’re ready to cut it into the flour, and work in a cool kitchen.
I’ve even seen home cooks pop their mixing bowl in the freezer for 5 minutes to keep things chilled. The extra effort is worth it for that buttery, layered perfection.
Overfilling the Crust
Piling too much filling into the crust causes it to burst or leak during baking. The filling should come up to about ½-inch from the top edge—any higher, and you risk a messy spillover.
If your apples release a lot of juice, pre-cook them for 5-7 minutes to reduce moisture. Trust me, a slightly underfilled pie is always better than a flooded one. 🍏
Neglecting the Steam Trick
That ½ cup ice water on the lower oven rack in the final 10 minutes isn’t just a gimmick—it’s what creates that crisp, golden crust. Without it, your edges will stay soft and doughy.
Place the water on a baking sheet to catch the steam, and position it directly below the pie. This works like a charm, even in home ovens.
Cutting Too Soon
Patience is key here! If you slice the pie too early, the filling will ooze out like a sad, runny mess. Let it cool on a wire rack for at least 2 hours—this lets the juices set and the crust firm up.
I’ve waited 4 hours for pies with extra-jucy fillings, and it’s always worth it for clean, elegant slices. 🕒
Nutrition facts
Frequently asked questions
Can I make this pie without a food processor?
The crust can absolutely be made by hand! Use a pastry cutter or two forks to cut the 1 cup cold butter into the flour until you get pea-sized pieces. Just work quickly to avoid warming the butter. The filling requires no special equipment—just a knife for peeling and slicing apples, and a saucepan for pre-cooking.
What's the best way to store leftover pie?
Store cooled slices in an airtight container at room temperature for up to 2 days. For longer storage, wrap individual slices tightly in plastic wrap and freeze for up to 3 months. To reheat, warm in a 350°F oven for 10-15 minutes until heated through. The crust stays crispy when reheated properly!
Can I use frozen apples instead of fresh?
Yes, but thaw them completely first and pat them very dry to prevent a soggy crust. Frozen apples work best in the filling, but they won't have the same texture as fresh. For best results, use a mix of fresh and frozen apples—just reduce the lemon juice to 1 tablespoon since frozen apples are already pre-treated.
Why did my crust turn out tough instead of flaky?
Most likely, you overworked the dough or used warm butter. The key is to mix just until the dough comes together—no more! Keep everything cold, including your hands, and avoid pressing the dough too much when rolling. Also, make sure your butter is cold but not frozen when cutting it into the flour.
Can I make this pie ahead of time?
Assemble the pie completely (including egg wash) and refrigerate overnight. Bake straight from the fridge for an extra-crisp crust. You can also prep the filling a day ahead and store it in an airtight container in the fridge. The dough can be made 2 days ahead and kept wrapped in the fridge.